How to order and manage Alfapass Lite identities
Added on 10/03/2026
Pre-conditions
- A valid account on the Prean web application.
- A valid registered company on the Alfapass web application.
1. Order Alfapass Lite
In the upper menu bar, you can open the Alfapass Lite dropdown to display three options
- My identities
- Identity profile
- Order identity
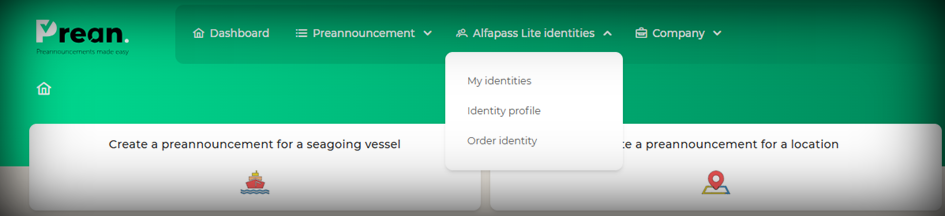
Click on the third option 'Order identity' to be brought to the order form.
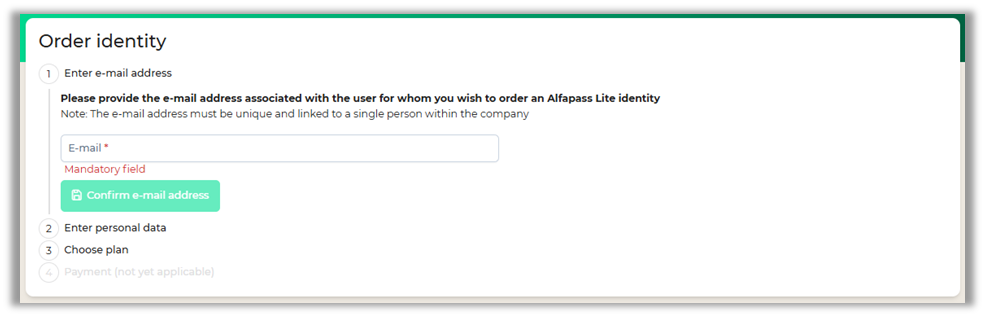
Step 1. E-mail address
Start of by adding the e-mail address for the identity. This field is mandatory.
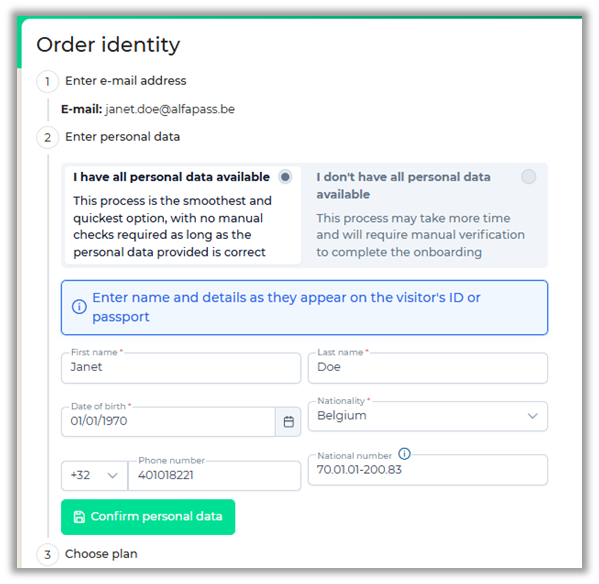
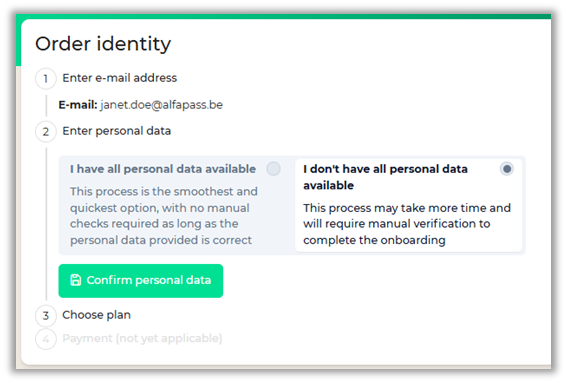
Step 2. Personal data
In the second step, you see a form that allows you to fill in all personal data. Note that while the National number is not a mandatory field for ordering the identity, it will be required for the user to complete the onboarding later on.
Alternatively, if you don't have all personal data to your disposal, you can opt to order the identity based on e-mail address. Keep in mind that by doing so, additional confirmation will be required after the owner has onboarded.
Step 3. Plan type
In step 3, select either the Pro Plan or Flex Plan.
The Pro Plan subscription is an anual plan that allows you unlimited authentications with Alfapass Lite.
The Flex Plan subscription allows you to use Alfapass Lite for a limited amount of 50 authentications per year.
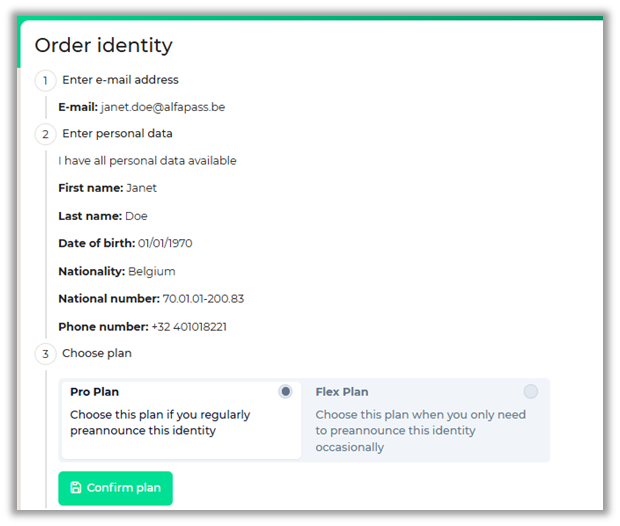
Step 4 (Payment) is not applicable yet as the system is now running a trial period with a select number of terminals.
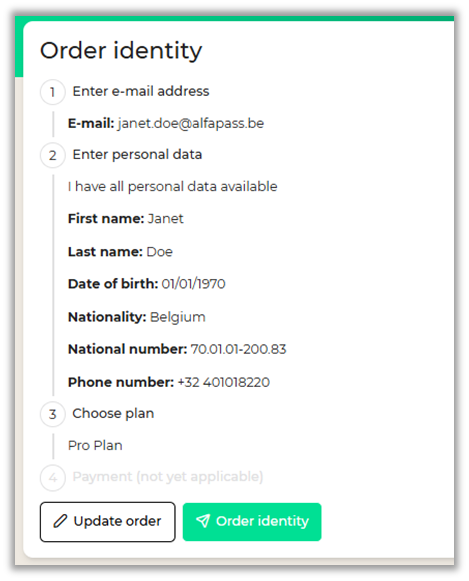
Review and confirm
After reviewing all data, you can place your order or update your order to make any changes to the previous steps.
2. Onboarding with Alfapass Lite
An email will be sent to the e-mail address provided during the order process. Onboarding is possible by clicking the button in the e-mail while on a mobile device or by adding the provided code manually in the Alfapass Lite app.
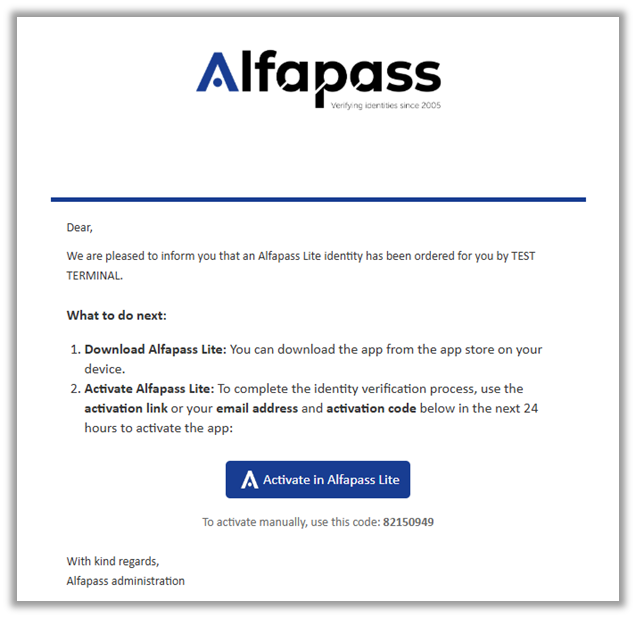
While in the mobile application, a tutorial with guide the user through all the steps required for a successful onboarding.
3. Manage identities
In the menu dropdown on the dashboard, you can click on My identities to see an overview of all your existing identities.
There are several options available to filter your identities based on status or look them up by name or e-mail address.
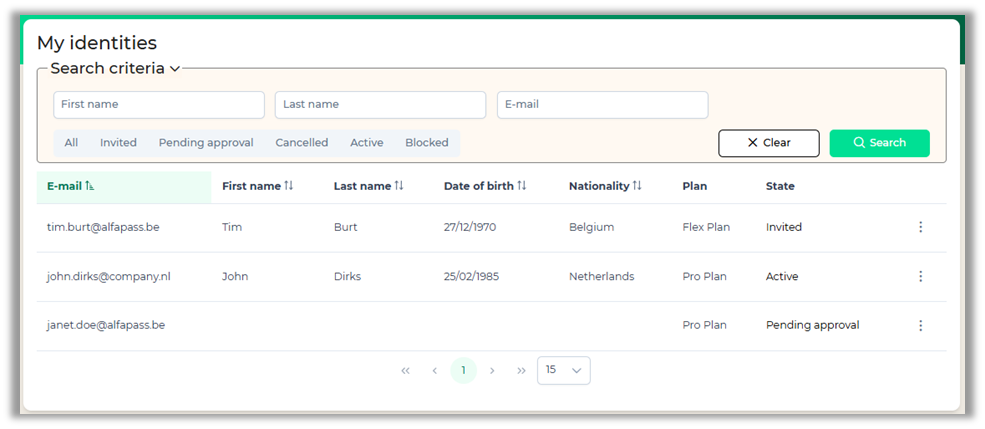
One of the possible statuses is 'Pending approval'. This can happen on two occassions: either the identity has been ordered without personal data or the personal data is not an exact match with the data provided during the mobile onboarding process. Click the three dots to open the action menu for this identity and Click on 'Verify onboarding'.
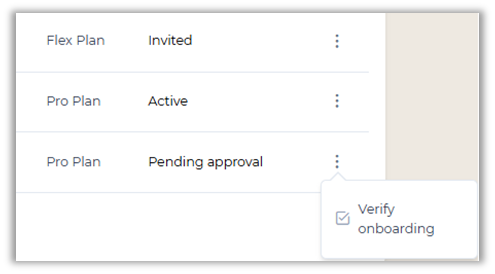
In the pop-up that opens, you can see the values that were ordered and onboarded. After review you can either cancel the order, or approve the updated personal data. After approval confirmation, the Alfapass Lite Identity will now be active and ready for use.

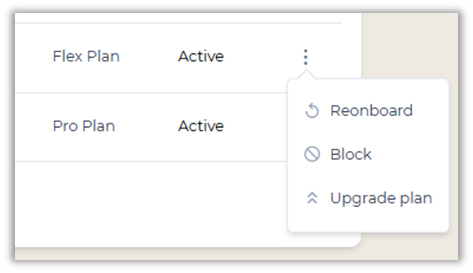
Opening the action menu for an active identity will display a few options:
You can reonboard a user. This option can be used when the user has a new mobile device and wants to activate the app on the new device.
You can block a user for example when they are no longer part of you company.
If the identity was ordered with the Flex Plan and you wish to switch to the Pro Plan subscription, the option 'Upgrade plan' will enable this.
4. Manage profiles
Overview
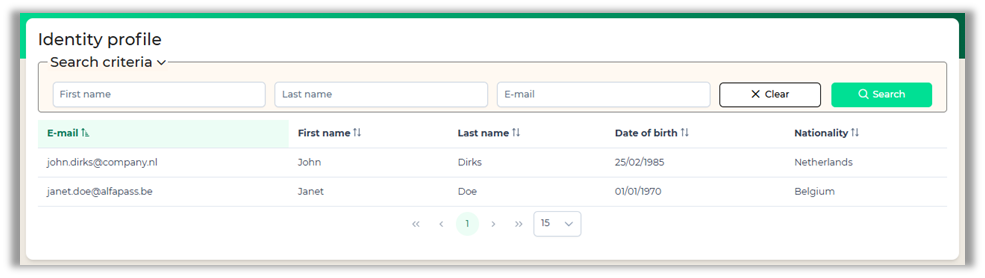
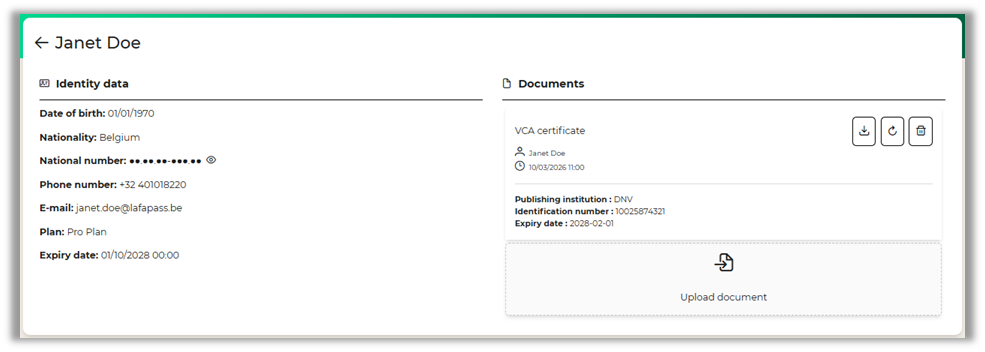
From the dashboard you can click on Identity profile to see more details about the existing identities.
Profile Details
Active profiles will be displayed here and can be viewed into more detail when you click on a row.
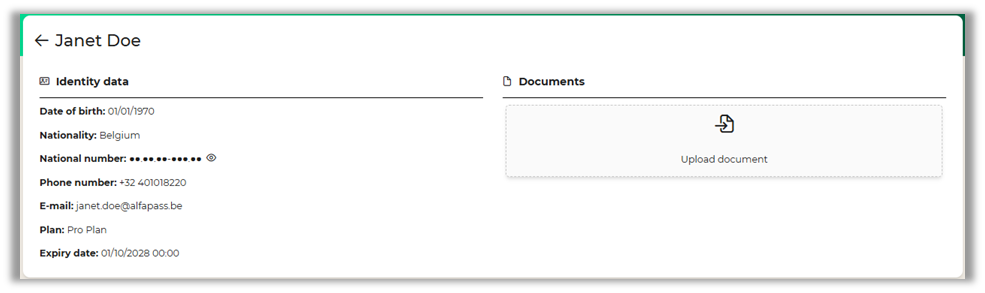
Upload documents
It is possible to upload a selection of documents to your Alfapass Lite profile. Whenever the identity is added as a visitor on a preannouncements, these documents will be attached automatically.
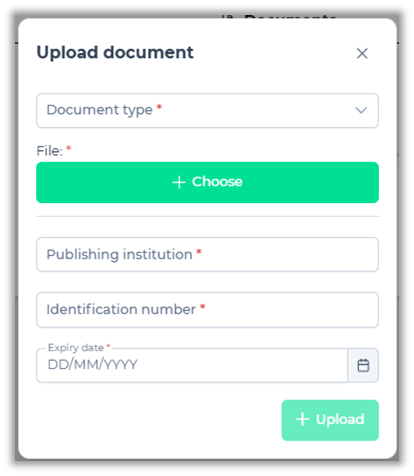
Click on the 'Upload document' field to open the pop-up. Select the document type from the dropdown list, add your document and fill in the required fields.
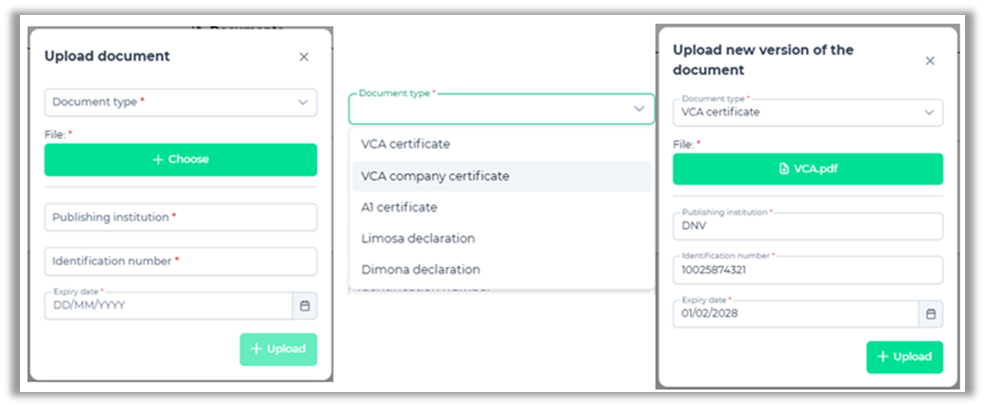
After completion, the document will be visible on the Profile details. It can be downloaded, renewed or deleted.
5. Create preannouncement
After a successful onboarding, the Alfapass Lite identity can be used as a visitor on a preannouncement.
