How to create a preannouncement for a seagoing vessel
Pre-conditions
- A valid account on the Prean web application.
- A valid registered company on the Alfapass web application with permission to create preannouncements.
- If you do not see any of these buttons on your company dashboard, please contact Prean via info@prean.be.

1. Select the seagoing vessel
Search the vessel you wish to add to the preannouncement. You’ll find it’s possible to search by name or stay number and filter on different ports.
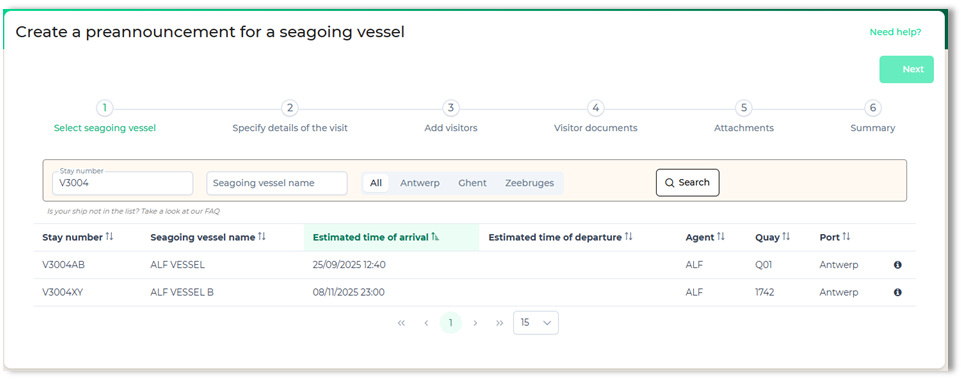
By selecting the vessel, the Next button will be enabled
If the vessel isn’t visible in the list, it means that the vessel isn’t announced yet by the agent or the terminal isn’t working with Prean.
If you want to know more about the vessel (the location where it is expected, the agent of the vessel, …) you can click on the info icon.

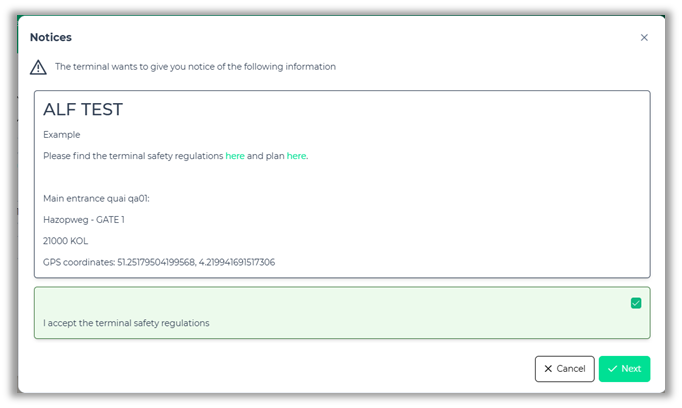
When the terminal or agent of the vessel has notices or notices that must be confirmed, it will open in a pop-up as soon as you navigate to Step 2. It’s possible that you need to agree explicitly before you’re able to continue.
2. Specify the details of the visit
The date and time for the visit is automatically set to ETA and, when available, ETD. Select a reason for the visit from the dropdown and add an optional comment if needed.

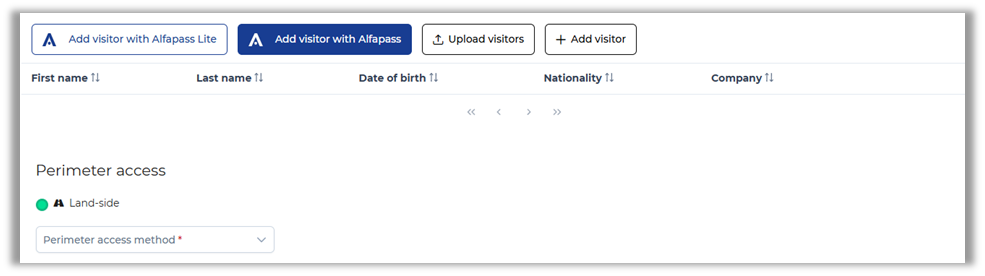
3. Add visitors
There are several options available depending on the configuration. You can add an Alfapass Lite identity, a visitor with Alfapass or a visitor without identity verification. Some terminals only allow visits from Alfapass holders or Alfapass Lite identities. When that’s the case those will be the only buttons displayed.
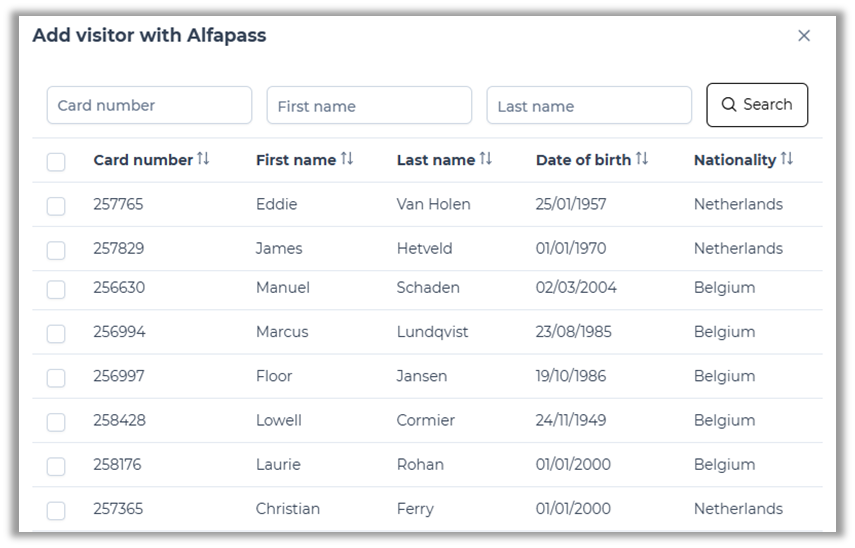
Add a visitor with Alfapass
By clicking on the button “Add visitor with Alfapass” you will open a popup that displays all Alfapass holders from within your company. You have several search options and can select multiple visitors as well.
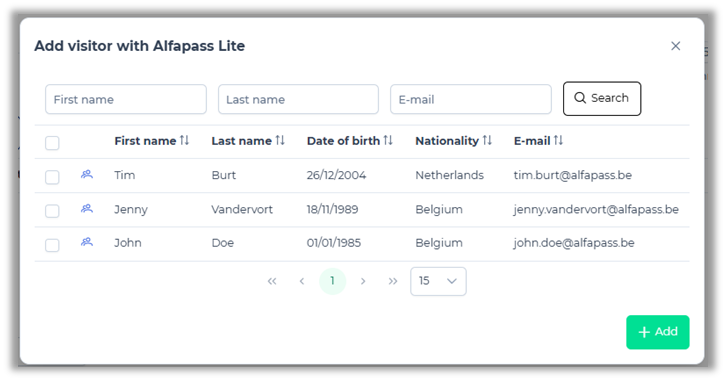
Add an Alfapass Lite identity
Provided that your company has them, you can click the “Add Alfapass Lite identity” button to open a popup that displays your active visitors. You can search by name or e-mail address and select one or multiple visitors.
Upload visitors by csv file
To have this option enabled contact us at info@prean.be. It is possible to add multiple visitors in bulk by uploading a csv file.
To upload a file click on the button "Upload visitors" and select the file you wish to upload from your device. To create a working csv file ensure to include the correct header and data.
firstName,lastName,birthDate,nationality,identityCard,nationalRegistrationNumber,companyName,phoneNumber,email,visitorComment
John,Doe,2000-01-01,BE,,00.01.01-001.05,DOE NV,+32 474123456,john.doe@mail.com,
Key things to focus on:
- Nationality must be the alpha 2 digit code of the country
- Date of birth format must be yyyy-MM-dd
- Phone number format must include the country code and phone number
- Data must be comma-separated
- The first row must contain the column headings as shown in the example
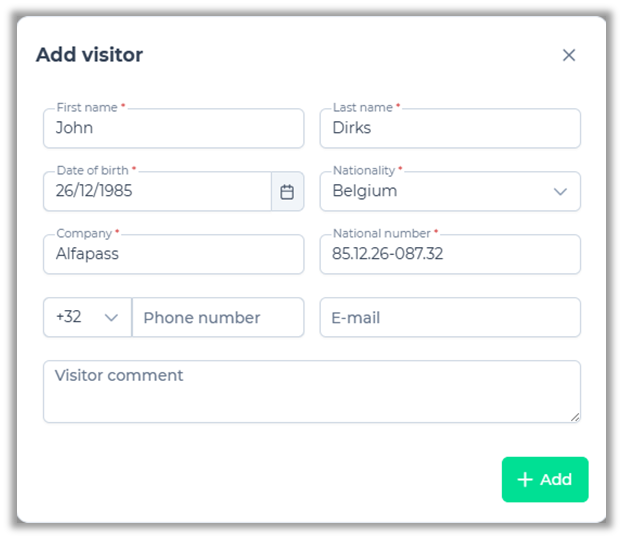
Add a visitor without identity verification
If identity verification is not a requirement, there will be an option to add a visitor without. Click the “Add visitor” button to open a popup that will allow you to enter all data manually. Required fields will be marked as such and cannot be left blank. The field “National number” will only be available for Belgian visitors. Visitors with any other nationality will have the “Identity card” field.
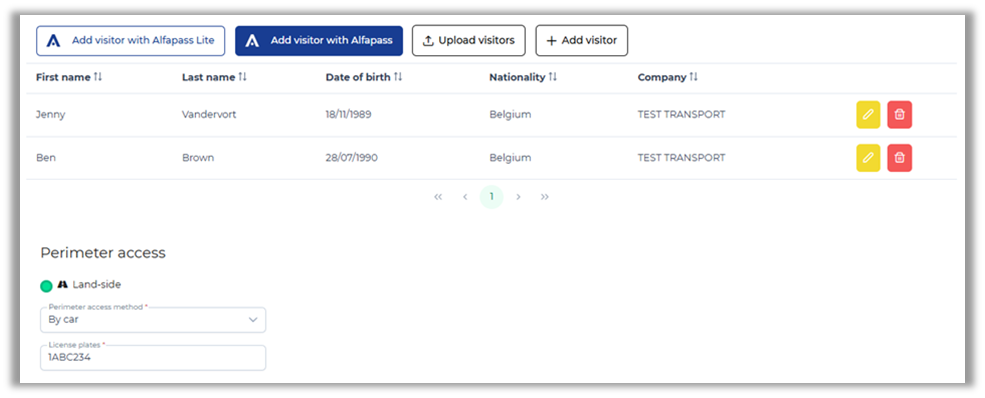
After adding your visitors, you can still edit and delete them from the overview. In addition to visitors, you can also specify a perimeter access method and a license plate. Multiple license plate entries are possible if you add the ‘ ; ‘ as a separator.
4. Add visitor documents
Some terminals require official documents or certificates to ensure that a visitor is compliant with certain standards. In this step of the process, documents can be added to each visitor.
When using an Alfapass Lite identity, these documents may already have been added to the visitor’s profile. In this case the documents will be uploaded automatically.
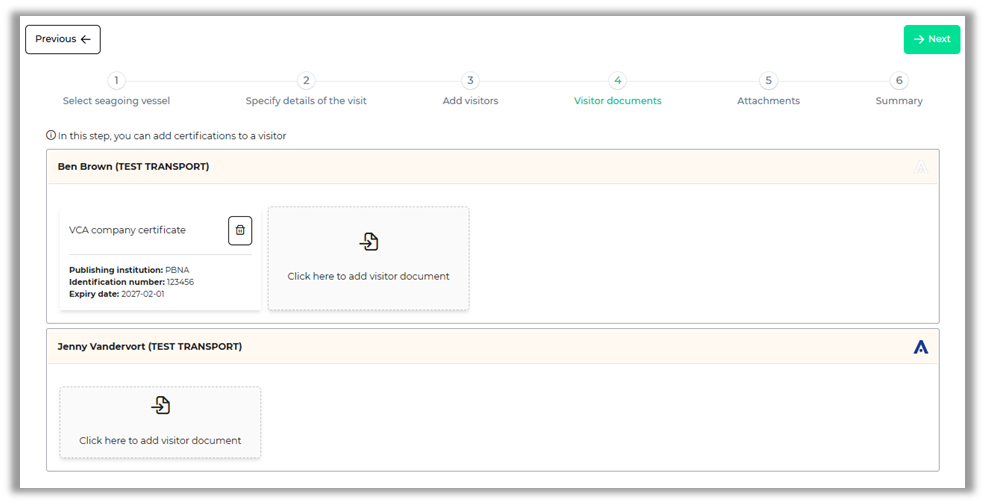
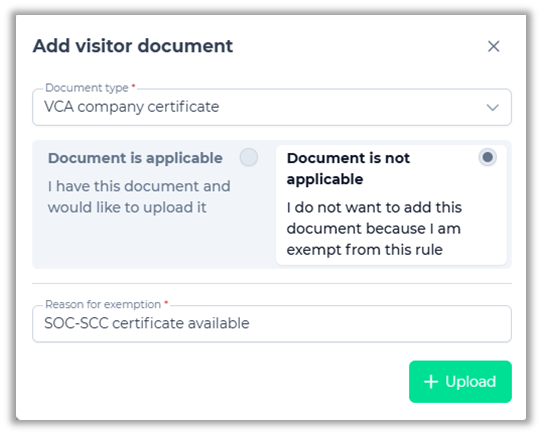
To add documents, click the upload button to open this pop-up. Select the document type from the dropdown menu. Currently the system supports the upload of VCA certificates, Company VCA certificates, A1 certificates, Dimona and Limosa declarations. Choose a file from your device and fill in the mandatory fields. Confirm the upload and the document will be attached to the visitor.
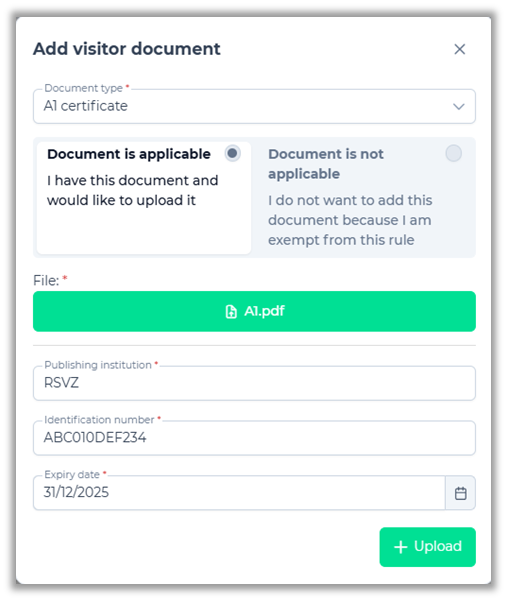
If a terminal requires a specific document, but you believe the visitor should be exempt, you can select the "Document is not applicable" option. You will be prompted to provide a reason and can continue the process without uploading a file. Any other documents or certificates not listed in the provided dropdown, can still be added in the next step.
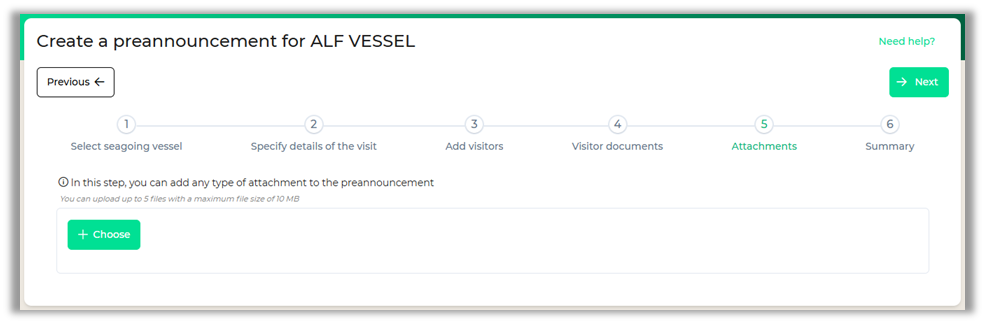
5. Add attachments
You can (optionally) add up to 5 attachments to the preannouncement with a maximum of 10MB. In case you would like to add a document that was not listed in the previous step or if the terminal asked for any other documents in the notices.
6. Review before sending
In the last step you will receive an overview of all the information entered. At this point it is still possible to return to previous steps and adjust the preannouncement before sending.
